

Publish your first 3D scene
This guide walks you through the full workflow: from creating a project to embedding a live 3D showcase in your website.
Before you start
Section titled “Before you start”- You need a registered Edro 3D account. If you don’t have one, sign up at cloud.edro3d.com.
- You need a 3D scene file ready to upload. Supported formats include
.glb,.gltf,.blend,.usd,.obj,.fbx, and.zip.
See Upload 3D scene for the full list of supported formats and upload limits.
Step-by-step instructions
Section titled “Step-by-step instructions”-
Create an organization and project
Section titled “Create an organization and project”First, open the following link and sign in or register.
You will be redirected to the project manager.
Edro 3D will prompt you to create an organization, if you don’t have one. An organization is the top-level container for your projects. Give it a name that represents you or your team, then click Create.
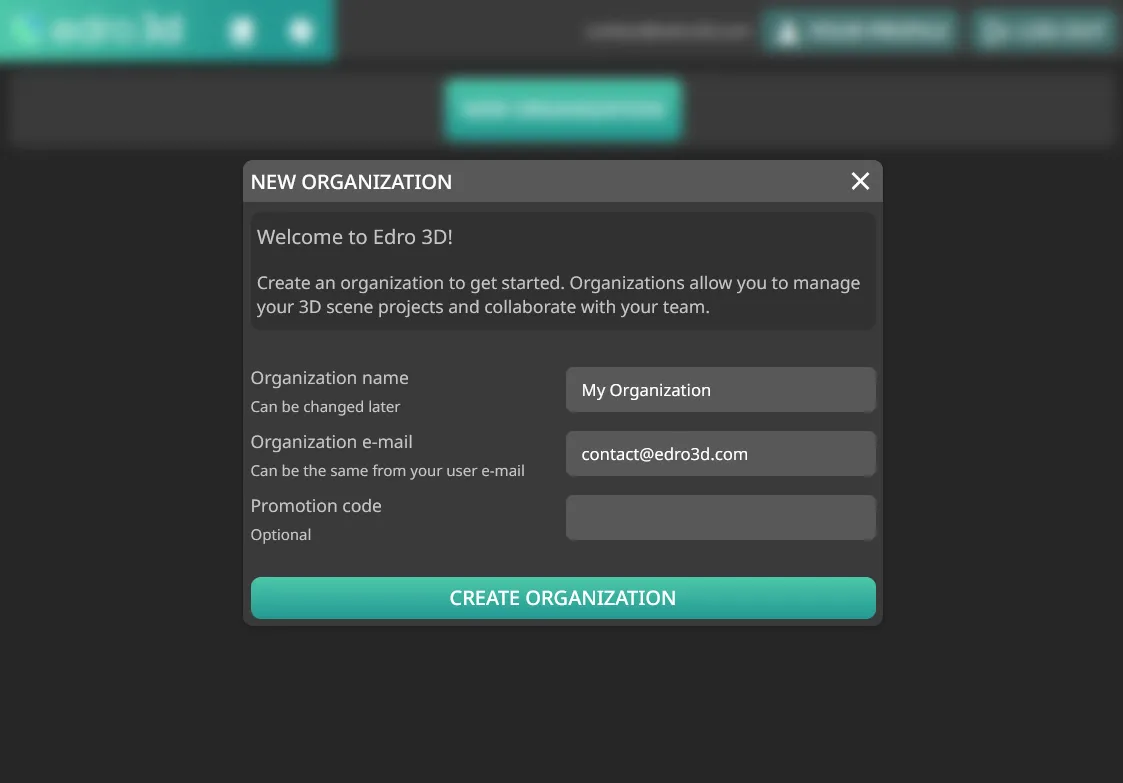
Upon creating your first organization, the New project dialog will automatically open. You can also press the New project button under the organization you want the project to belong to.
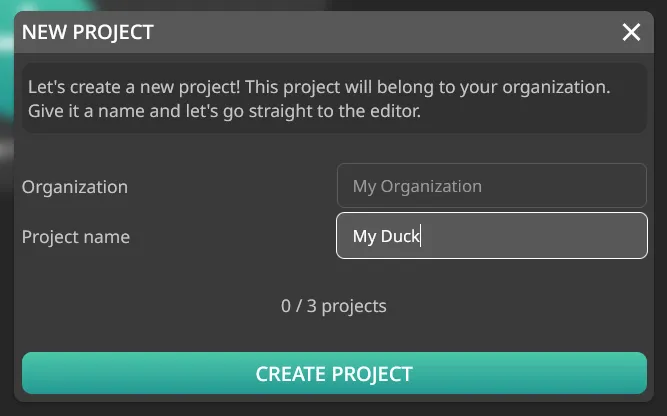
Enter a descriptive name — you can always rename it later — and click Create project. You will be redirected to the project editor, and the Upload 3D Scene dialog
-
Upload your 3D scene
Section titled “Upload your 3D scene”Inside the editor, the Upload 3D scene dialog should open automatically, since this is the first required step to set up a showcase. If you closed it, click the Upload 3D scene button near the top right corner.
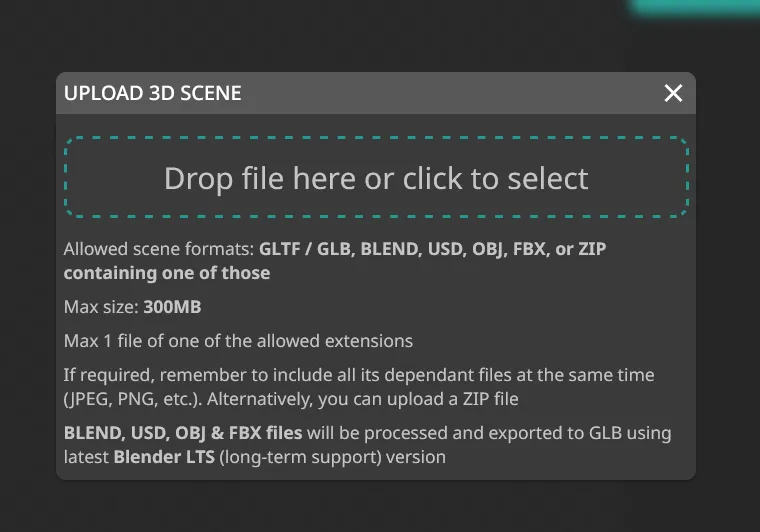
Drag and drop your scene file into the upload area, or click to open a file picker.
After upload, Edro 3D queues a processing job that converts your scene to the internal format. A progress indicator appears in the editor while this runs. Wait for it to finish before continuing.
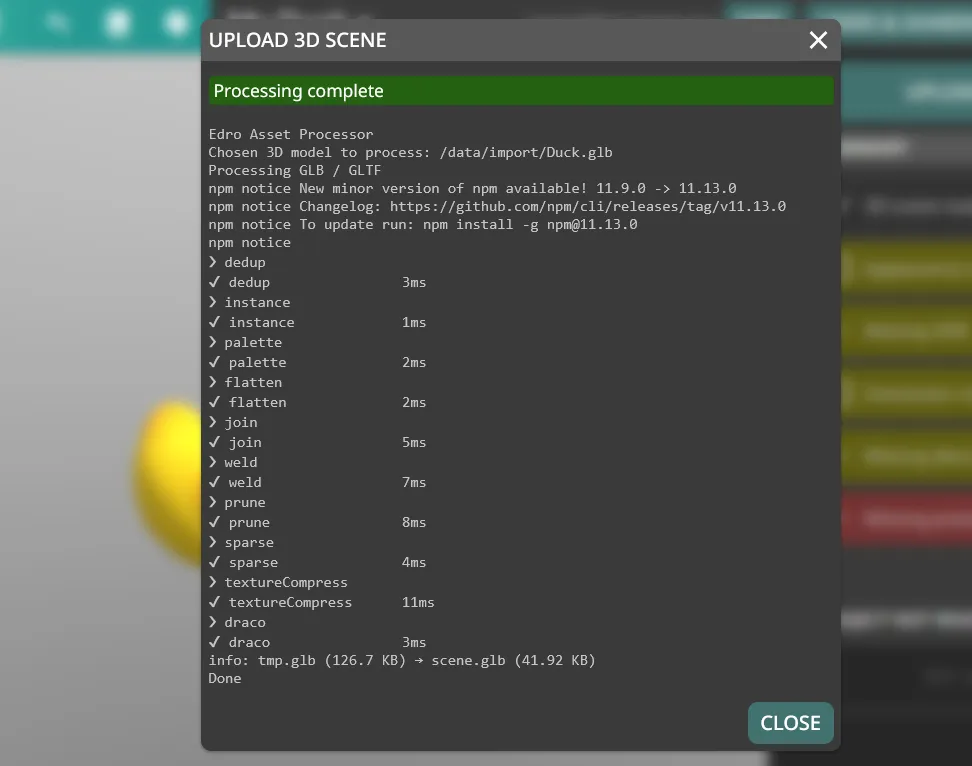
When processing completes successfully, the dialog will show the processing output log. In the event of an error, the log will contain error messages to help diagnose the issue. Common errors include missing dependencies (textures, binary files) or unsupported features in the source file.
Close the dialog to continue.
-
Configure the showcase settings
Section titled “Configure the showcase settings”Once your 3D scene processing is completed, the full editor is unlocked. You can interact with your scene on the viewport, while the sidebar holds all the options to shape how your showcase looks and behaves. You can test the changes you make directly on the viewport, in real-time.
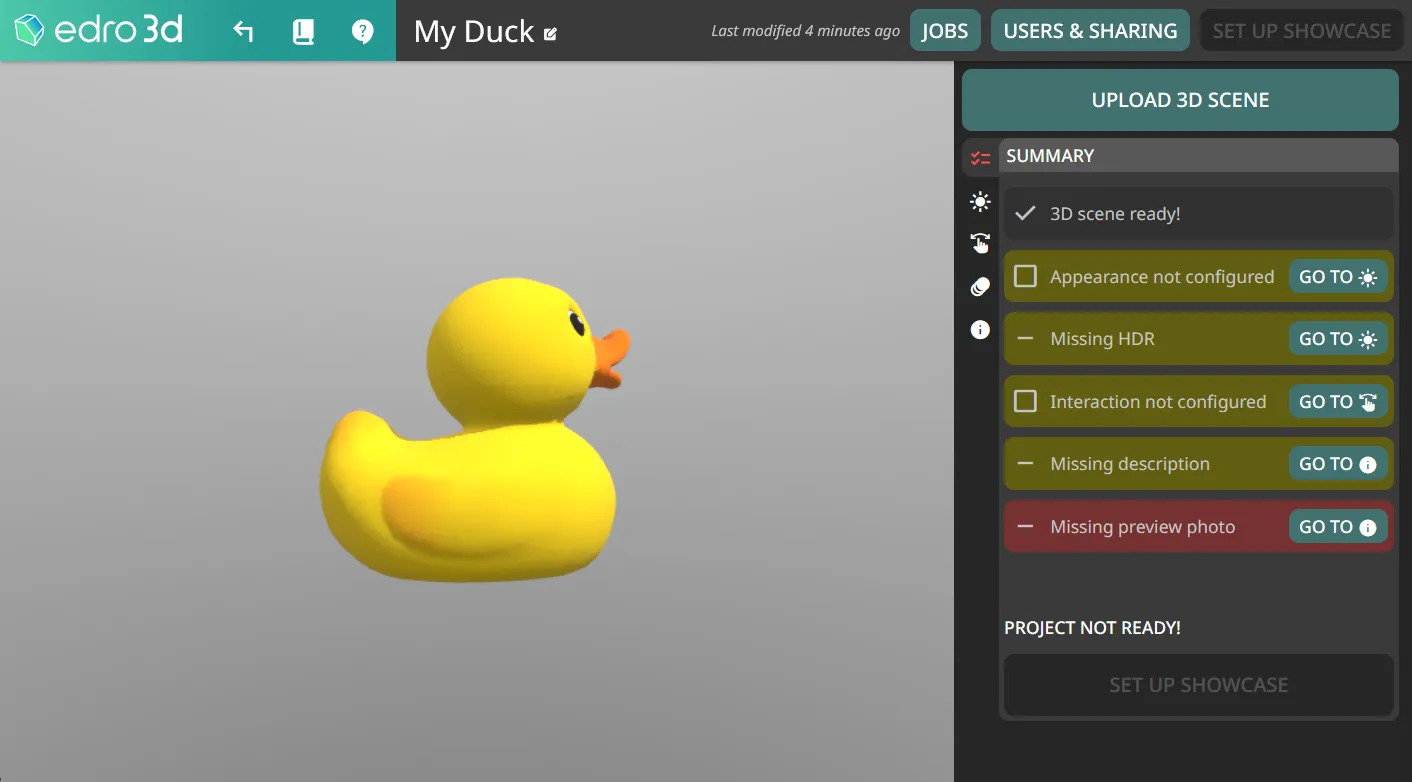
Let’s explore all the tabs in the sidebar! None of these steps are strictly required (except taking a preview photo), but going through them ensures visitors get the intended experience.
The Summary tab gives an overview of the required steps to deploy your showcase. It shows which steps are complete and which still need attention. As you complete each step, check back here to see your progress.
Open the Appearance tab to control the camera, background color or image, ambient lighting, and post-processing effects.
Open the Interaction tab to choose how visitors navigate the scene. The three available modes are:
- Pivot — visitors orbit around a central point using mouse or touch. Best for product showcases.
- First person — visitors move through the scene as if walking inside it.
- Fixed camera — no navigation; the camera stays still. Best for scroll-driven or animation-only experiences.
If your scene file contains named animation tracks, open the Animations tab to configure how they play — on a loop, on demand, or driven by scroll position.
Open the UI & Metadata tab to:
- Write a description for your scene (shown in link previews and optionally as an in-viewer overlay).
- Customize the user interface, change which buttons are shown and its UI accent color to match your brand.
- Take a preview photo, more on that on next step.
-
Take a preview photo
Section titled “Take a preview photo”A preview photo is required before you can deploy. It is used as the loading screen image and in link previews when the showcase URL is shared on social media or in messages.
- Navigate the 3D viewport to the angle that best represents your scene.
- Open the UI & Metadata tab and scroll to the Preview photo section.
- Click Take photo. The current viewport view is captured and saved.
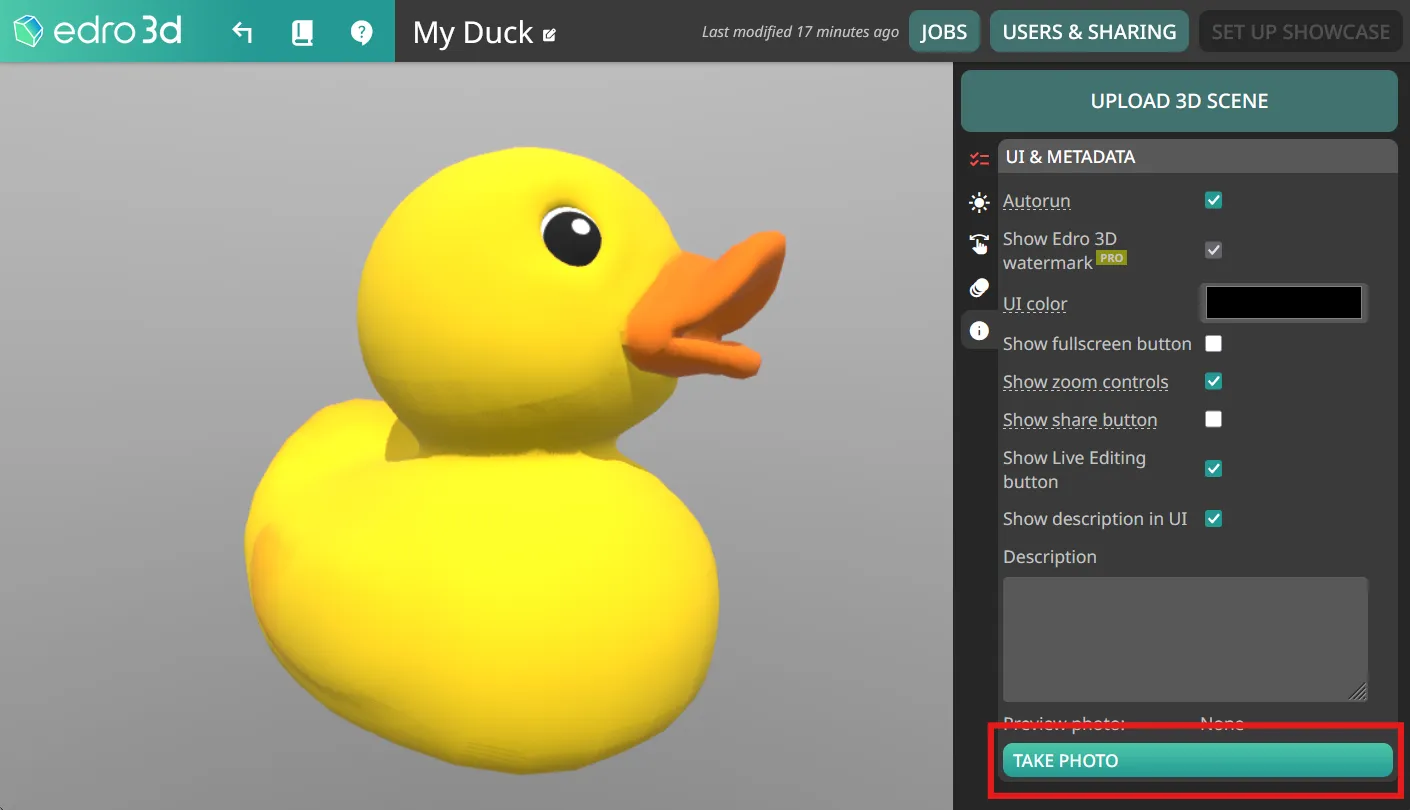
Once a preview photo is saved, the Preview photo item in the Summary checklist turns green.
-
Deploy the showcase
Section titled “Deploy the showcase”When all required items in the Summary checklist are completed, the Set up showcase button on the top right corner becomes active. Click on it to open the showcase dialog and then click Deploy
A public URL is generated for your showcase based on the project ID.
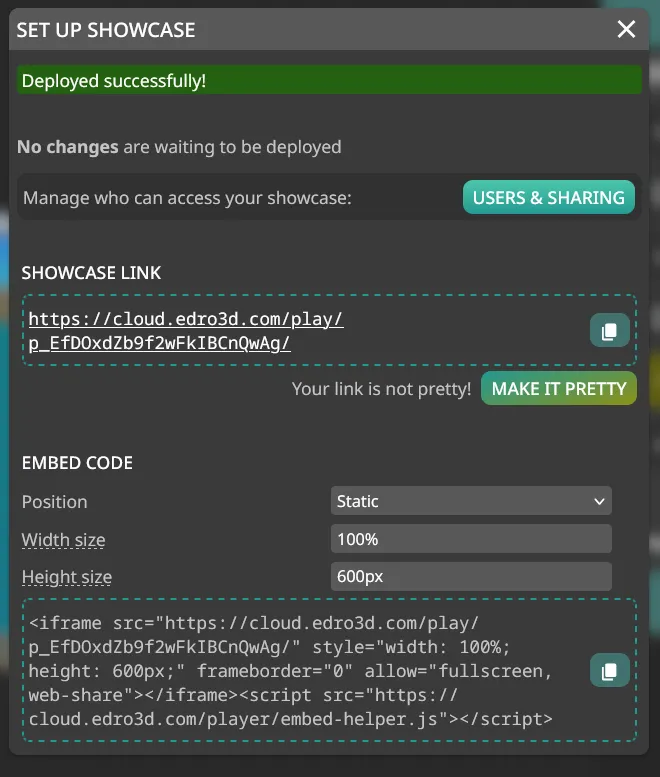
After deploying, click the showcase URL to verify it looks correct in the public viewer before sharing it or adding embed code to your site.
-
Share the showcase
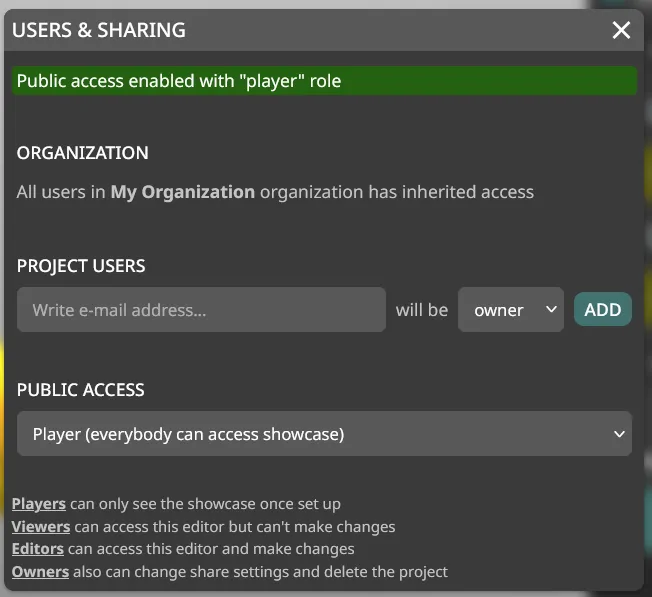
Section titled “Share the showcase”By default, only members of your organization can view the showcase. To make it accessible to anyone with the link:
Open the Users & sharing dialog from the top-right area of the editor, and set Public access to Player. Now, anyone with the link can view the showcase without signing in.
-
Embed in a website
Section titled “Embed in a website”Now that your project is deployed and publicly accessible, you can place your deployed showcase inside any web page using an
<iframe>.Open the Set up showcase dialog and navigate to the Embed section. Use the options panel to configure the iframe size and CSS position, then copy the generated code.
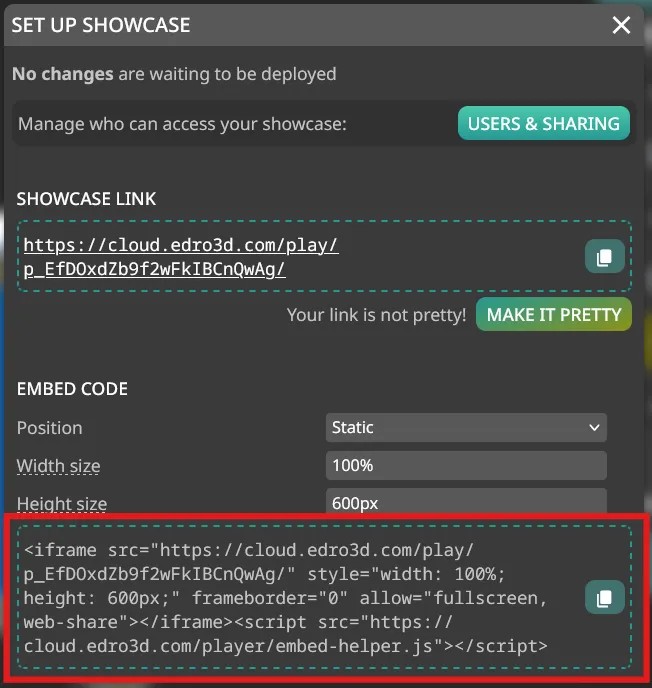
Paste the code into your website’s HTML where you want the showcase to appear.
See Embed code for size, position, and scroll animation options.
Troubleshooting
Section titled “Troubleshooting”The Deploy button is greyed out. The Summary checklist has one or more required items still incomplete. The most common missing item is the preview photo. Check the Summary tab for any items shown in red.
The iframe shows an authentication error. Public access is not enabled on the project. Follow the steps in Share the showcase above.
The scene processed but looks wrong (wrong scale, missing textures, black materials).
This usually means the source file has dependencies that were not included in the upload, or the file uses features not supported by the glTF exporter. Open the Jobs panel and check the processing log for warnings. For .blend files, try using Blender’s Pack Resources feature before exporting.
The slug field is not available. Slugs are a Pro plan feature. If your organization is on the free plan, the URL will use the project’s alphanumeric ID.